
Showing posts with label DIY. Show all posts
Showing posts with label DIY. Show all posts
Tuesdays with Tish: Christmas Decorations DIY
In which I show you my Christmas decorations, watch the Kemptville Santa Claus parade, and shoot an episode of The Unicorn Hunt.
Some things I didn't mention about my DIY decorations...
Felt Mistletoe: I drew a couple different stem with leaves templates on paper, pinned it to the felt, and cut it out. (You could also trace it with a felt-tip pen and then cut it, but I wanted to avoid the inky mess.) I made five sprigs and glued them onto another little piece of felt rolled in a cylinder. This made it easier for the sprigs to be a little further apart, so they don't all fall flat on each other. I cut the white berries out of a white fuzzy fabric I had, but tiny white pom-poms from the craft store would be great, too.
Paper Snowflakes: Remember to fold your paper to make six points, not eight. Try using a protractor to get the angles, 6 x 60º = 360º. For my big snowflakes on fancy cardstock that I couldn't fold, I had to trace a pattern on and then cut out. Try making the snowflake the regular way on paper, then tracing that onto the cardstock. Or make just the pattern (60º angle, fold in half, cut pattern) and repeat it (measure your 6 60º sections) tracing it, and then cutting it out. I hung my snowflakes with white thread tied to the snowflake and to a sewing pin (which I painted white, so they wouldn't stand out) which I could easily stick in my false ceiling tiles. You could try white thumbtacks or just scotch tape for regular ceilings.
I think I explained the rest of my DIYs enough in the video. :)
The Unicorn Hunt // DIY: Unicorn Horn Cupcakes
In episode 3 of The Unicorn Hunt, we made cupcakes to lure in the unicorns featuring fondant unicorn horns (so the unicorns would know the cupcakes were for them). Now, you can learn how to make your own fondant unicorn horns, so you can lure some unicorns over!
The Unicorn Hunt // DIY: Unicorn Poop Cookies

Aren't they adorable?! Here's how you can make your own!
Here are some tips we left out of the video:
Chill your dough as often as possible. After you make the recipe, after you color it, and after you create your cookies. Cold dough is easier to work with and putting cold cookies into the oven stops them from spreading even more.
You may be tempted to flour your work surface when working with cookie dough, but in this case it will not help. Although the stickiness of the dough can seem to make rolling out thin logs tricky, using flour means that your strips of dough won't stick to each other when you try to roll them together into one cookie.
The long, thin strips of dough will break often. It's no big deal, just stick it back together and be careful as you roll.
You will find as you roll from one end there will be a point at which it seems like you're rolling the wrong way. You should start rolling from the other end, in the opposite direction. Your twisting will come together in the middle and your dough will be fully twisted.
You can try spraying water from a spray bottle onto your cookies to help small sprinkles stick. Larger sprinkles are easy enough to press into the cookie by hand.
The vegan sugar cookie recipe I used was from BettyCrocker.com.


Have fun and watch out for the next episode of The Unicorn Hunt on November 27th!
Links + Likes // 02.12.12
More Handmade Valentines: Playful, Psychic and Sweet by Mr. Kate on Hello Giggles

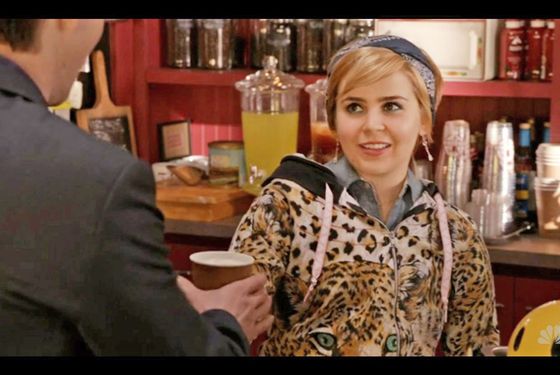
I actually like her hair and most of her outfits, but they do make their point that she has worn some questionable outfits on the show.
Buy a Ticket: Sleepless in Seattle on I Love Wildfox
I love this idea and the resulting photos. It's basically a photo story of two girls visiting a city, checking out the vintage shops and happenin' spots, and making you jealous of their fabulous lives.

My blog friend, Mandy, is having a really neat giveaway on her blog, Chocolate & Cream Cake! Some Amazon gift cards, yes, but what I'm really excited about is winning a custom bookplate design! Mandy made this geeky cute one for her & her husband's personal library (for the inside cover of books, so borrowers know where to return it) and I love the idea! I hope I win, so we can design one for me together, but I may just design something for myself. ;)

Literally the Best Thing Ever: Degrassi on Rookie
Degrassi (the original series, guys) really is one of the best TV shows ever. I remember going to my best friend's house everyday after school to watch Degrassi Junior High on TV. She even once cut her hair like Liz. Man, we were so cool. Degrassi taught me so much about being a teenager, even though I was only in the third grade. I think it prepared me for high school much better than Clueless, which was also a big influence on third grade me, did. I watched the entire series this past year and loved every bit of it, even though 80's fashion hurts my eyeballs.

Scott Pilgrim vs. Reality on Torontoist
As a Scott Pilgrim fan and a Canadian, I was extremely jealous when my friends, who have lived in Toronto, said they recognized a lot of places from the Scott Pilgrim movie (which, like the comic, is set in Toronto). Someone got photos of the real-life places depicted in the Scott Pilgrim comics to compare. Nerdfest!

Let's all Watch Dawson's Creek! Episode 8: "The Ex-Boyfriend" on Hello Giggles
I have no interest in ever watching Dawson's Creek (I think I was bit young to be enticed by it when it originally aired, so I've never seen it.) but I am so enjoying these hilarious recaps.

January Project // Super Mario World Felt Mural
My first project of 2012 is something that I've been planning on doing for probably almost a year. At least since May, because that's when I bought all the felt. It's about time I get this done! I will be making an interactive felt wall mural of a Super Mario World level.

The idea started out as an idea of what to put on my fridge. I thought of making Super Mario World characters, blocks, etc. out of foam sheets on magnets to have fun moving them around. That idea transformed into felt, since my fridge is small but I have a nice, big blank wall with lots of room for a long Super Mario World level.
The idea is that since felt will cling to felt, I can have fun moving the characters, blocks and bits around on the background without any damage. So, not only will I have a beautifully felt-recreated Super Mario World level mural on my wall, but I'll get to play with it! It's like, instead of a computer screen, it's felt and instead of a controller, you use your hands!


Now, this project will not take me an entire month of work to put together. It's only felt and glue. However, it requires a lot of planning and design before I actually get to the glue and felt. I'll have to do a lot of research (aka Google image search) of Super Mario World levels. Super Nintendo version, of course. I'm not going to recreate any specific level. What's the fun in that, when I can pick and choose backgrounds, hills, obstacles and pipes from any of the levels?
The background (sky, ground, hills) will be glued in place while the blocks, pipes, enemies, mushrooms and other collectables, and characters will be moveable. My originally planned size was 6' x 1.5', but that may change as my furniture arrangement has changed.
Halloween Cake Pop Tree
This is what I spent my 22nd birthday doing...


THE CAKE POPS My first attempt at cake pops. Chocolate cake & icing. Dipped in dark chocolate. Sprinkled with Halloween sprinkles. The bats and ghosties are fondant. That eyeball is not edible. I used a big needle and twine to thread the cake pops. I tied a knot,
threaded through a fake leave to create a base they couldn't slip off
of, and threaded through the cake pops.
THE TREE I gathered up some branches. Secured with hot glue and twine. Decorated with real and fake leaves. There is a cardboard base beneath the leaves. The bats and ghosties have jewelry wire through them to create loops on top to tie twine to.
Tish.TV DIY // Duct Tape Dress Form
As I recently mentioned, my friend Kim and I made a video of how to make a dress form out of duct tape. We had made one two years ago, but after being asked to write the instructions for BUST magazine, I wanted to make one again. I wanted to make it better than last time so I could actually use it and make a better video for it.
So, we finally did it! It took us/me three different days over two weeks, but I finally finished it off. We had some disasters (insulation foam is the devil), but I've decided my slogan will have to be "Welcome to Tish.TV DIY where I make mistakes, so you don't have to!"
See for yourself how you can make a dress form your exact size with duct tape, newspaper and a very helpful friend!
And just yesterday I got a message from Copper Etiquitte, saying that they featured both Duct Tape Dress Form videos on their blog. That's pretty cool. Take a look.
Oh, for reference, here is our first video. Hopefully you find my new video much more helpful.
I Wrote an Article for BUST Magazine...
I've been dying to share this exciting news since May! I was contacted by an editor at BUST magazine to write a DIY article of how to make a duct tape dress form for the August/September issue. She had seen my video (P.S. A new & improved video is on its way!) and then checked out my blog, and I guess liked them both enough to think I was the girl for the job!
It was such an exciting experience to be contacted by a real-life publication to write for them! Even though it's just a short instructions article, it's such a big deal for me. I can say I've been published!


If you're interested in making your own dress form using duct tape, you can watch my video to see how it's done. But- stay tuned for my new & improved video, which will be much more helpful than the first video and the article. It should be up in a few weeks. :)
Links & Likes
I'm going to try to do one of these Links & Likes posts every week. There are so many great things I find all over the internet everyday, but they don't all warrant their own post. So this is my way to share some great blog posts, videos, photos, etc. that deserve your attention.
I discovered the amazing note-taking, organization tool Evernote [I Just Might Explode]
Some Springtime eye candy. Tulip Belt of the Netherlands! [Doe Deere Blogazine]
A beautiful fashion video, The Curve of Forgotten Things for Rodarte starring Elle Fanning.
(I actually like the visuals of the video as a whole, more than the actual clothes.)
I've got to get these molds! Fight Club Chocolate Bars! [A Beautiful Mess]
I'm in love with Anna Sui Spring 2011, Wildfox White Label Spring 2011, and Wildfox Fall 2011.
I've got to try this DIY: Lace Sunnies [Audrey Kitching]
This beautiful animation...
I love the photos and video for 31 Bits New Line "Haven" [Promise Tangeman]
Emily Browning is so beautiful it pains me to look at her because I'm so jealous. Also, she makes me want a bowler hat.

Under the Sea...
Recently I've realized I have a thing for tentacled oceanic invertebrates. Jellyfish, squid, octopus. I don't know why, I just love 'em. Oh wait, I do know why. They're so pretty! They have pretty colors and they're all flowing in the water and they can make so many positions. I just love 'em.


And my favorite under the sea creature... the sock squid Addie made for me. <3 br="">

Delcious Day 8: Paper Snowflakes

Oh, wait. These aren't edible. Oh, well. They're simply delicious to look at. Eye candy, if you will.
If you've somehow missed learning how to make a paper snowflake, check out Mandi's post The Art of Making a Paper Snowflake.
These are all the supplies you will need. I also ended up using some silver origami paper and some tissue paper.
These are all the supplies you will need. I also ended up using some silver origami paper and some tissue paper.

Here are a couple of examples of patterns to show how they look folded and then opened.


I put a couple heavy books on top of the snowflakes after I unfolded them, to keep them nice and flat. I also suggest that, as you unfold each fold, fold it way back, so that each layer gets unbent.
And then I made some out of tissue paper.


And then it's time to get your glitter on! Last year I used white glue and poured glitter on it, which was extremely messy. So this year I opted for glitter glue.


Etsy Shop Preview: Glasses
I am tantalizingly close to finally getting my Etsy shop up and running. I'm just waiting on getting my credit card (need one to set up an Etsy shop, pay for fees, etc.) and getting a few details in order like photographing my products, deciding prices, figuring out packaging, and finishing up some products I'm working on.
What I can show you so far are the glasses I've made. I'm bad at deciding on prices, but I think the yarn glasses will be $10 or $15 and the ones that took more time and supplies will be $20.
Yarn Nerd Frames : Pink/Orange

Yarn Nerd Frames : Blue/Green

Yarn Nerd Frames : Dark Purple

Yarn Grandma Frames : Pink/Orange

Yarn Grandma Frames : Blue/Green

Rhinestone Nerd Frames : Pink/Purple

Sunglasses : Studded Wayfarers

Sunglasses : Disco Mirror


[I used my ironing board cover as a background. Isn't it the cutest?!]
Subscribe to:
Posts (Atom)